
Two Stall Engine House
| Built by S.Phillippe BC. Canada |
 |
 |
 |
| Built by Geoff Tannock-Australia |
 |
 |
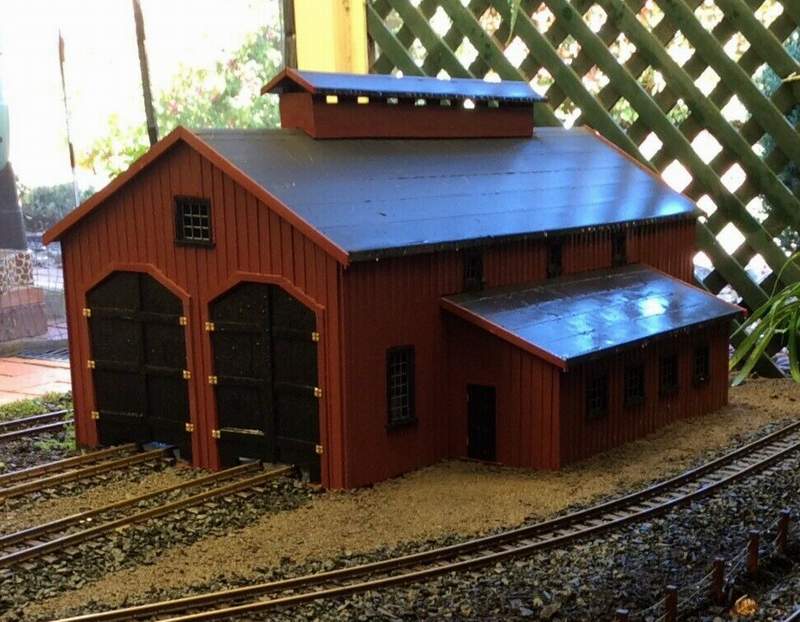 |
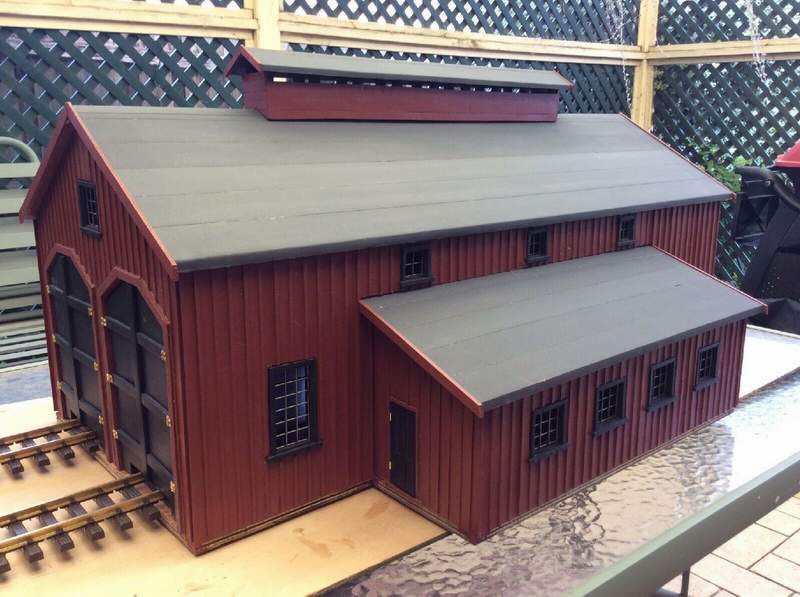
| Built by Dave Teece BC. Canada |
 |
 |
 |
| Dave Teece, |
|
Since my locos are 1:20 scale, perhaps I should have scaled the plans up but left them at 1:22.5 as I did not want to make the building any larger for my small layout. I was a bit worried about clearance under the doors for the locos so made the decision to raise the building up a bit on a Sintra plastic foundation that stays in place. The building will come inside during our rainy winters in Victoria BC. Raising the building just a bit gave me the extra clearance under the doors. Purists, of course, will hate such a choice, but I am not concerned and happy with this decision. The Sintra plastic base was scribed to represent concrete blocks, painted grey and coated with several coats of polyurethane and partially buried in the ballast. Only a small portion remains in view so it is not a major distraction. The sub structure was a 1/4 inch thick Baltic birch cabinet plywood. Then the cedar planking was glued on to that. I used Ted Brewer�s recommended method for simulating board and batten planking by gluing a thin plank, followed by a square batten, then the next plank, etc. rather than a true batten covering the seam between planks which wouldn�t provide as much gluing surface. Because the building is raised up slightly on the foundation, I made the loco doors a bit longer to hang down closer to the ground when closed. i.e. the doors hang down a bit farther than the lower edge of the walls. I still need to make sets of steps for the �people� doors as they are now raised up a bit above the ground level. While the plans suggested the office portion might be full length, I liked the shorter asymmetric look of a shorter office as shown in a sketch on Ted�s website. I also went with the plain cedar planking (not board and batten) for this office area and a �rolled tar paper� roof treatment there to suggest the office section might have been an addition later in time. For the roofing I tried different thicknesses of material and while my choice may be slightly too thick to be in scale, I found I needed that to show up the separate layers when viewed from farther back. I used a paper product we get here called "Bristol Board� (used for making posters) with many many coats of polyurethane to try and protect it from the damp. It might not hold up and have to be replaced in the future but I wanted to try it out. The main roofing is corrugated �tin� that is showing rust. I found aluminum sheet that is .004 inches thick to be best for my Fiskars corrugating tool. Pepsi cans were just right but too much work to cut up in quantity. I found some nice large oven pans that were this thickness. I didn�t etch the finished panels in TSP or ferric chloride as some modellers have done. With about 300 panels to handle, that was too much work, I merely sprayed them all together with grey auto primer and glued the panels in place, using a construction adhesive spread in a thin layer via a homemade notched spreader. Then I dry brushed them with �rust� coloured paint (Model Master 4675 acrylic �Rust�) and applied polyurethane over that to protect them. Trying to decide on an exterior colour scheme was hard. I ended up making up cedar test panels and trying out various mixes on them before committing to the actual building. I ended up using a thinned mixture of two paints: Craftsmart Brick Red flat acrylic (from our local Michael�s craft store) mixed 1 part paint to 10 parts water. Model Master Boxcar red flat acrylic from my local hobby shop also mixed 1 part paint to 10 parts water. Finally, I mixed 4 parts of the Boxcar red mixture to 1 part of the Brick red mixture to arrive at the final colour. This was just brushed on and when dry and rubbed on some black artist�s pastels (powdered) starting from the bottom and thinning upward. Then I added a bit of green artist�s pastels in lower areas also to simulate the moss we often get in our climate. Windows, of course, are the recommended Grandt Line castings. They were painted (just brushed) with American DecoArt Light Avocado acrylic paint (also from our Michael�s craft store). Now that Grandt Line will soon close there doors, I am not sure what fittings future builders of this structure will use. There is buried wiring popping up inside the office area and eventually there will be lighting in the building but that is probably as far as I will go with it. Being a very new railroad layout I have much more to do elsewhere in the future. Thanks for your interest. Dave Teece
|
Return to Home Page Structures